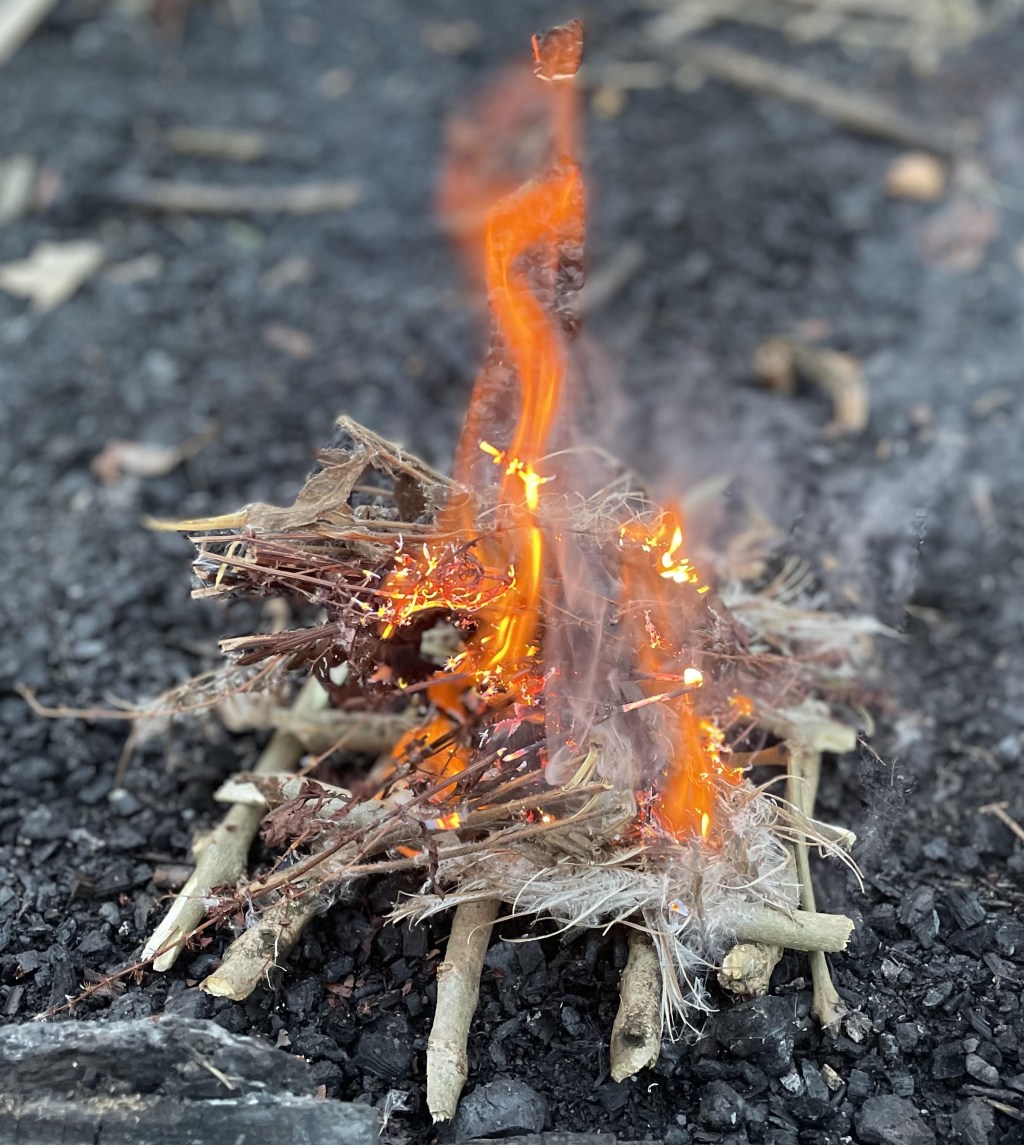
Fire Lays
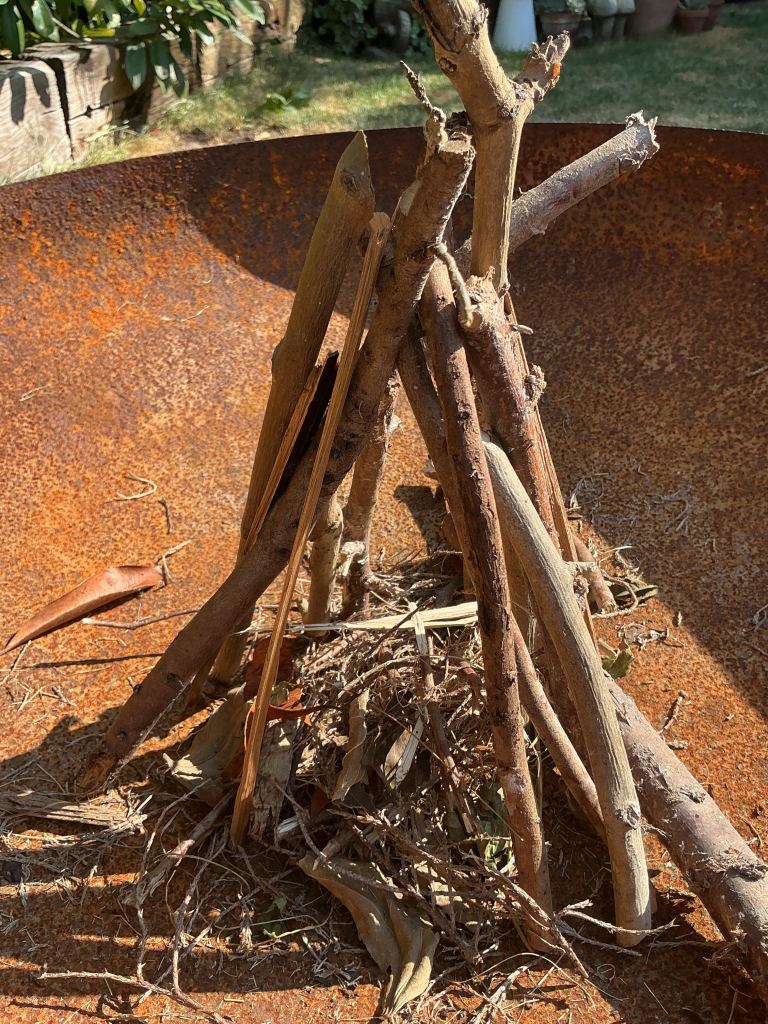
Tipi – To build a tipi fire lay:
- Place a small bundle of dry tinder in the centre of the fire pit.
- Arrange the smallest pieces of kindling (matchstick thickness) around the tinder, leaning them together to form a cone or tipi shape.
- Leave a small gap on the side facing the wind or where the fire will be lit. This allows air to enter and provides access for the ignition source.
- Add slightly larger pieces of kindling (pencil and finger thickness) around the outside of the tipi, ensuring there are still gaps for airflow.
- Light the tinder using a fire steel, match or lighter.
- As the fire becomes established, gradually add thumb-thickness fuel followed by larger pieces of wood, no thicker than an adult’s wrist.
Advantages
- Excellent airflow allows the fire to ignite quickly.
- Easy to build, making it ideal for beginners and Forest School students.
- Produces a strong flame in a short amount of time.
- Requires minimal preparation and materials.
- Ideal for boiling water, cooking and general campfire activities.
- The structure naturally collapses inwards as the wood burns, helping to feed the fire.
Disadvantages
- Burns through fuel quite quickly, so it needs regular topping up.
- Can become unstable if the sticks are not balanced correctly.
- Could be difficult for my students to build and balance.
- Less suitable in strong winds, as the flame can be blown over or the structure may collapse.
- If too much wood is added too soon, the airflow is reduced and it will go out.
Waffle – A waffle fire lay, also known as a log cabin fire lay, is built by stacking small sticks in alternating layers to form a square shape. This design creates excellent airflow while providing a stable structure that supports the fire as it grows.
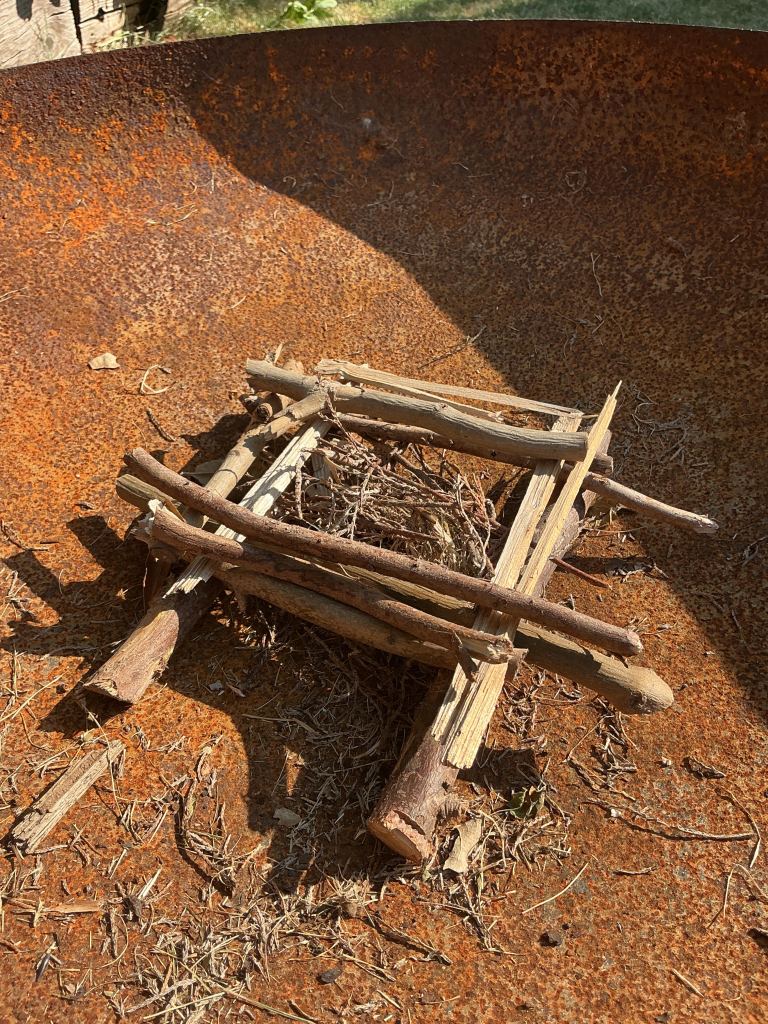
To build a waffle fire lay:
- If the ground is damp, place two thumb-thickness sticks parallel to each other to form a base.
- Place a small bundle of dry tinder in the centre.
- Lay two small sticks across the base, then add another two at right angles to create a square.
- Continue building alternating layers, using matchstick- and pencil-thickness kindling, leaving gaps between the sticks to allow oxygen to circulate.
- Light the tinder in the centre.
- As the fire becomes established, gradually add thumb-thickness fuel, followed by larger pieces of wood no thicker than an adult’s wrist.
The waffle fire lay burns steadily as each layer collapses into the centre, producing a controlled fire with good airflow. It is particularly useful for cooking and for creating a long-lasting campfire.
Advantages
- Very stable structure that is unlikely to collapse.
- Excellent airflow between the layers encourages efficient burning.
- Raises the fire off damp ground, helping the tinder stay dry.
- Produces a steady, long-lasting fire.
- Well suited for cooking because it creates an even bed of embers.
- Easy for students to build as the layers follow a simple repeating pattern.
Disadvantages
- Takes longer to build than a tipi fire lay.
- Uses more kindling during construction.
- Requires careful stacking to maintain good airflow.
- Can be slower to produce a large flame.
- If the gaps between the sticks are too small, the fire may struggle due to reduced oxygen.
Star Fire Lay – A star fire lay is made by placing several logs in a star shape, with one end of each log meeting in the centre of the fire. The fire burns where the ends of the logs meet, and as the wood is consumed, the logs are gradually pushed further into the centre to maintain the fire.
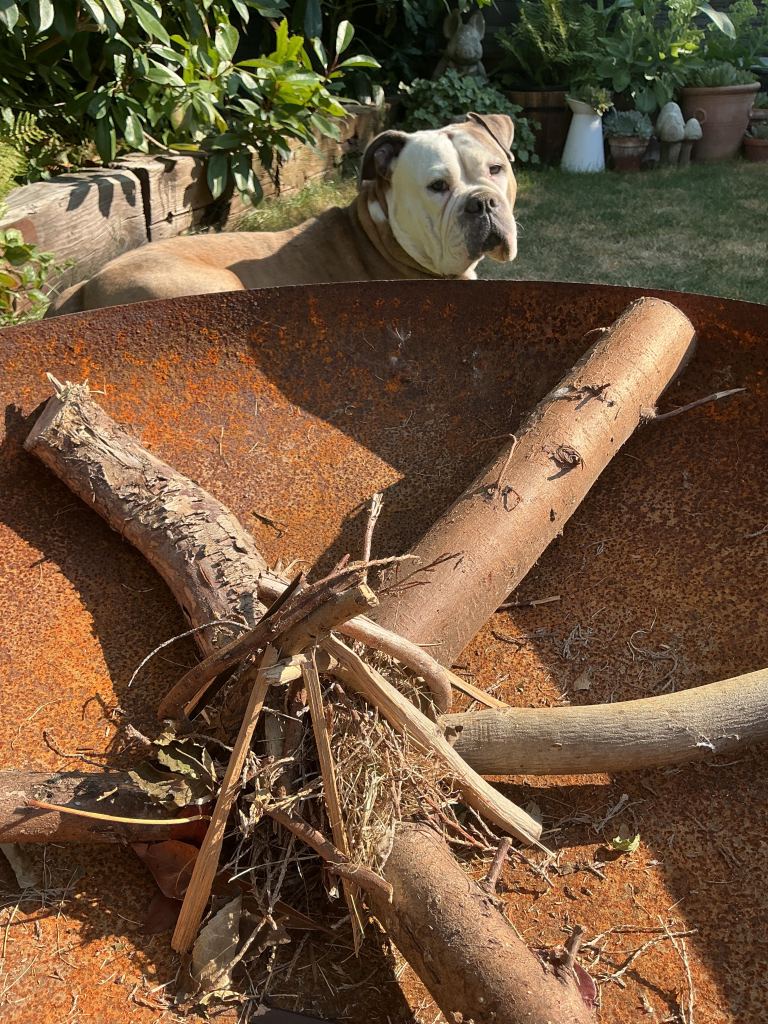
To build a star fire lay:
- Arrange four to six dry logs in a star shape with their ends almost touching in the centre.
- Place a small bundle of dry tinder in the middle of the logs.
- Build a small tipi using kindling over the tinder.
- Light the tinder.
- Once the tipi is burning well, gradually add thumb-thickness fuel if required until the ends of the star logs begin to burn.
- As the logs burn, gently push them further into the centre to maintain a steady fire without adding excessive amounts of new fuel.
This fire lay provides a long-lasting, controlled fire and is an efficient way of using fuel, as only the ends of the logs burn at any one time.
Advantages
- Uses fuel very efficiently, as only the ends of the logs burn.
- Produces a long-lasting, steady fire with minimal refuelling.
- Easy to control the size of the fire by pushing the logs further into the centre or pulling them back.
- Requires fewer additional logs once the fire is established.
- Creates a good bed of embers, making it suitable for cooking.
- Encourages students to think about fire management rather than continually adding more wood.
Disadvantages
- Slower to establish than a tipi fire lay.
- Requires a well-built tinder and kindling structure in the centre to ignite the larger logs.
- Needs regular attention to move the logs towards the centre as they burn.
- Requires more space around the fire because the logs extend outwards.
- Less suitable for quick fires where immediate heat or flames are needed.
- If the logs are too large or damp, they may not ignite easily from the central fire.

 Forest Footsteps
Leave a comment